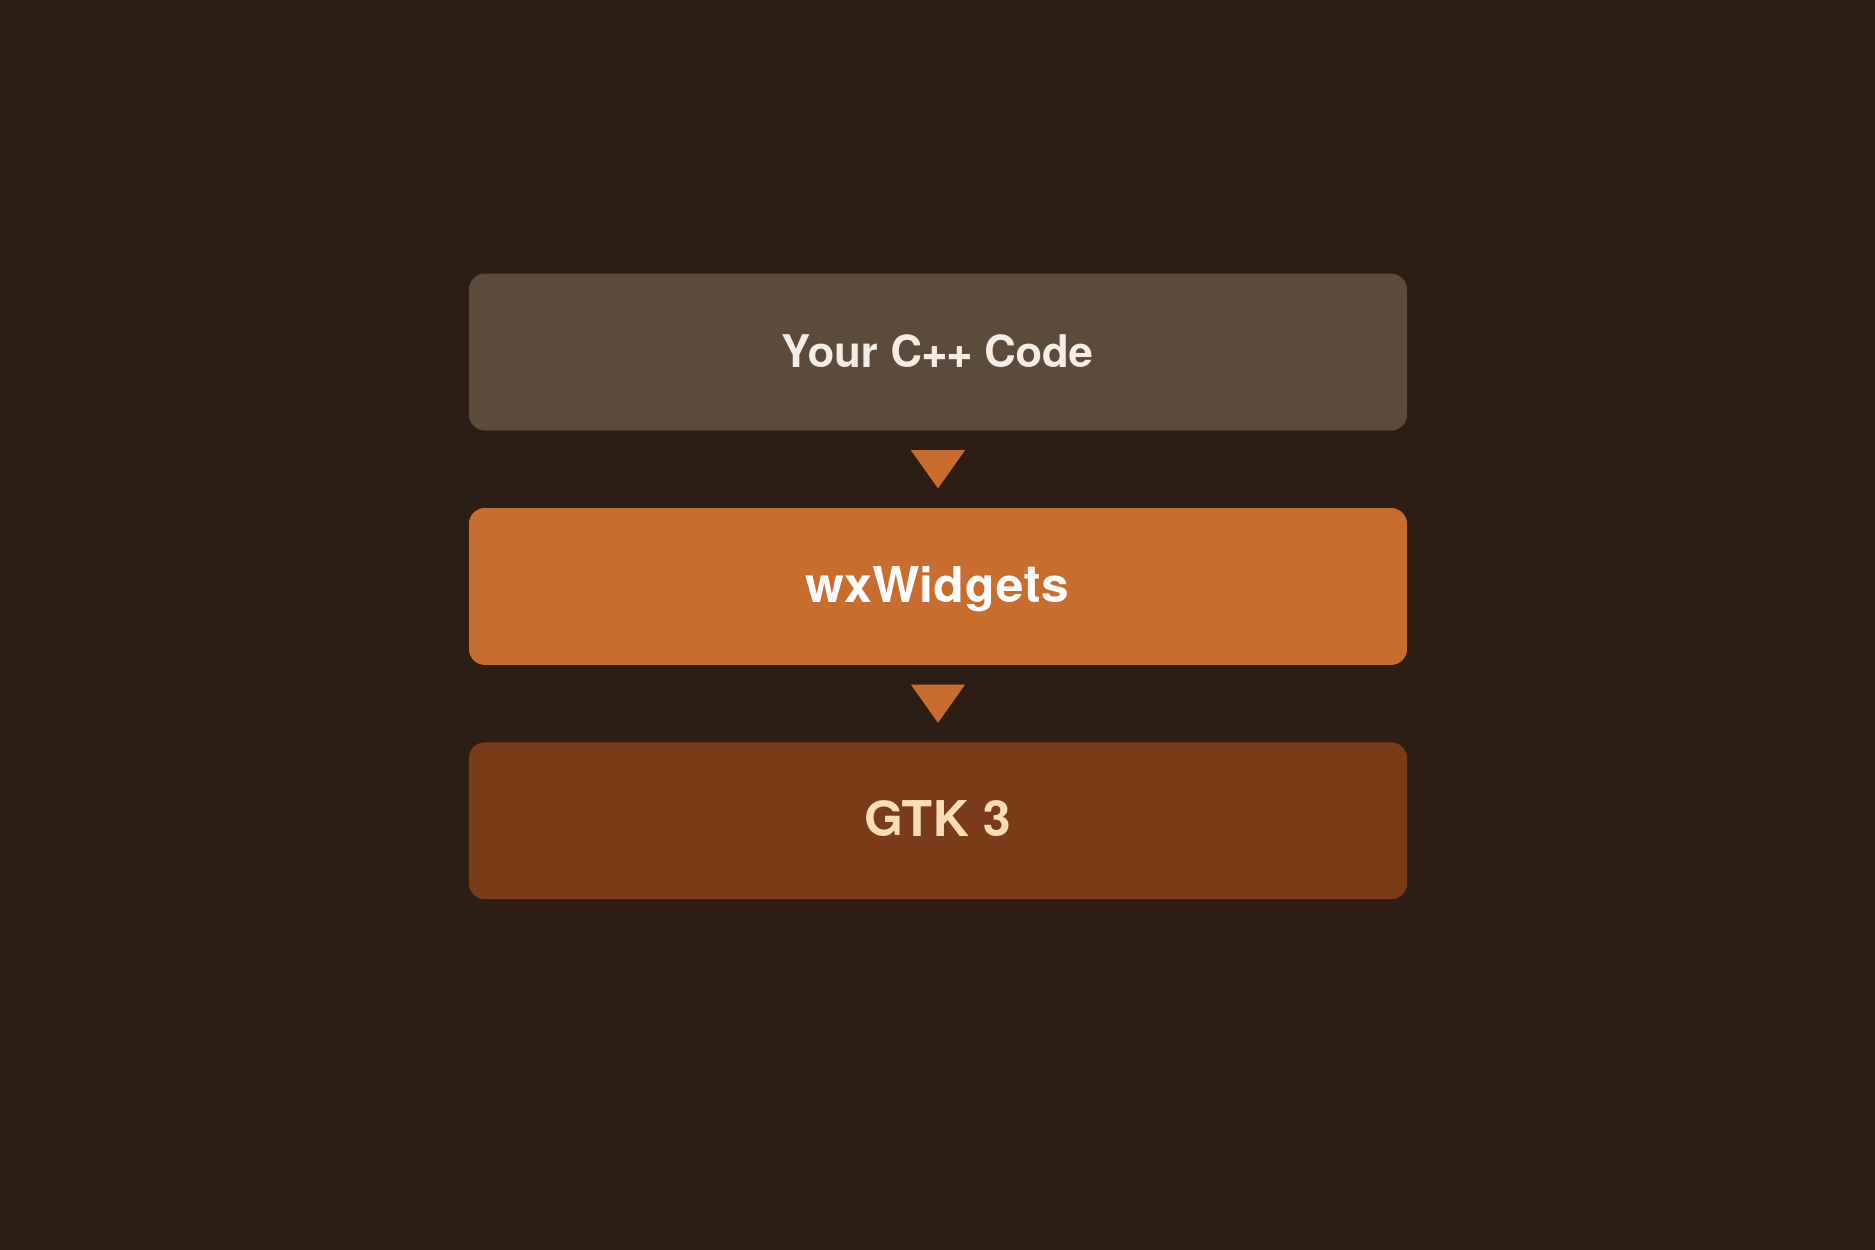
Let's talk about displaying large datasets in wxWidgets. If you've ever
tried adding tens of thousands of items to a wxListCtrl, you know it
can get painfully slow. The control creates an internal object for every
single row, regardless of whether it's visible on screen.
There's a better way: virtual mode. This is a companion post to my List Controls video tutorial, which also covers sorting and selection handling in detail:
The Regular Approach
Let's start with the standard way to populate a wxListCtrl. We loop
through our data and insert each item one by one:
for (int i = 0; i < items.size(); i++)
{
    plainListView->InsertItem(i, items[i].date);
    plainListView->SetItem(i, 1, wxString::Format("%.2f", items[i].low));
    plainListView->SetItem(i, 2, wxString::Format("%.2f", items[i].high));
    // ... more columns
}
This works fine for a few hundred rows. But each InsertItem call
creates an internal object, and the control keeps all of them in memory.
With large datasets, the population loop itself becomes noticeable
(we're talking several seconds for 100K rows) and the memory overhead
adds up.
Switching to Virtual Mode
The idea behind virtual mode is simple: the list control doesn't store
any data itself. Instead, it calls our OnGetItemText method whenever
it needs to display a cell. We tell it how many rows exist, and it only
ever asks for the ones currently visible on screen.
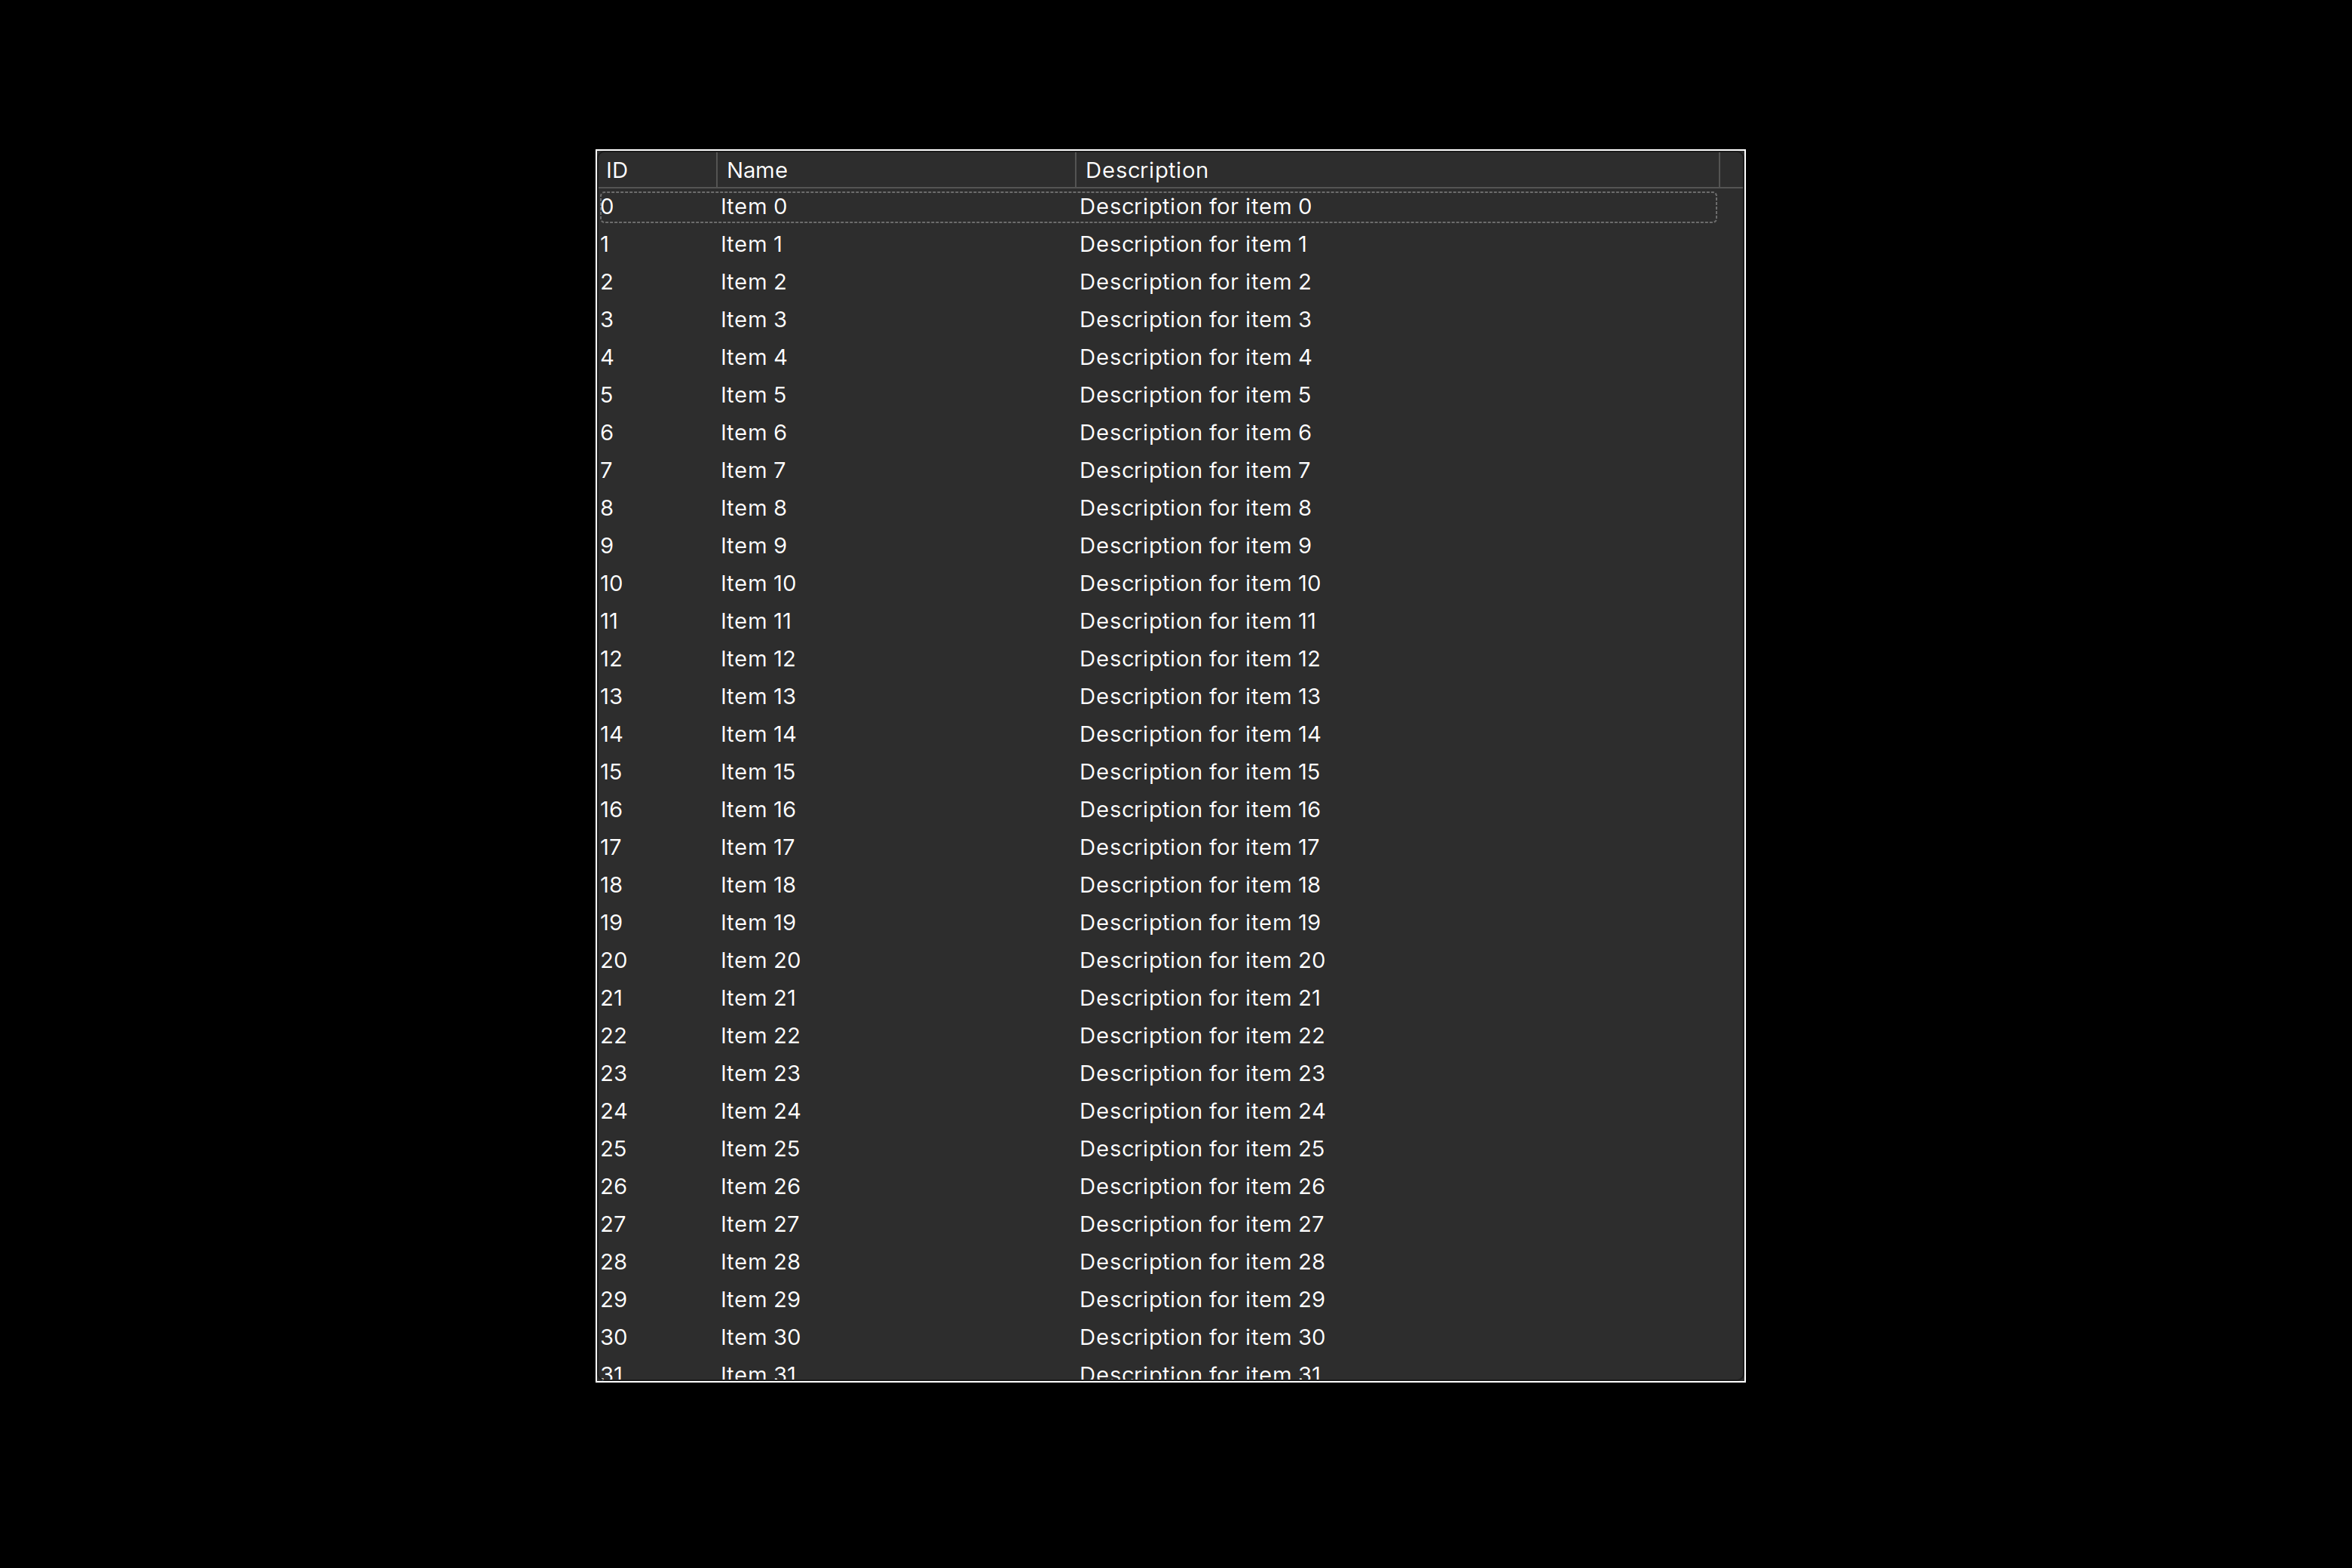
Let's build a minimal virtual list control. First, we need a simple data structure:
struct ItemData
{
    int id;
    std::string name;
    std::string description;
};
Now, our virtual list control class. We inherit from wxListCtrl and
pass the wxLC_VIRTUAL flag in the constructor. This is what tells
the control not to store data internally:
class VirtualListControl : public wxListCtrl
{
public:
    VirtualListControl(wxWindow *parent)
        : wxListCtrl(parent, wxID_ANY, wxDefaultPosition,
                     wxDefaultSize, wxLC_REPORT | wxLC_VIRTUAL)
    {
        AppendColumn("ID", wxLIST_FORMAT_LEFT, 80);
        AppendColumn("Name", wxLIST_FORMAT_LEFT, 120);
        AppendColumn("Description", wxLIST_FORMAT_LEFT, 400);
    }
The key part is the OnGetItemText override. The control calls this
method whenever it needs the text for a given cell. We simply look up
the data in our vector using the index and return the appropriate
field based on the column:
    wxString OnGetItemText(long index, long column) const override
    {
        const auto &item = items[index];

        switch (column)
        {
        case 0: return wxString::Format("%d", item.id);
        case 1: return item.name;
        case 2: return item.description;
        default: return "";
        }
    }
We also need a helper method to update the control after changing the
data. SetItemCount tells the control how many rows exist, and
Refresh triggers a repaint so it calls OnGetItemText for the
visible rows:
    void RefreshAfterUpdate()
    {
        SetItemCount(items.size());
        Refresh();
    }

    std::vector<ItemData> items;
};
Using Our Virtual List
Populating the virtual list is refreshingly simple compared to the
regular approach. We just assign our data and call RefreshAfterUpdate:
virtualList->items = myData;
virtualList->RefreshAfterUpdate();
No insertion loop, no SetItem calls. With 100K rows, the difference
is dramatic – the virtual list populates almost instantly, while the
regular list can take several seconds. If you want to see this
comparison in action, check out the
video tutorial where
we measure the time with wxStopWatch.
When to Use Virtual Mode
Virtual mode is a great fit when our dataset has more than a few hundred rows, or when the data already lives in our own data structure (a vector, a database result set, etc.) and we don't want to duplicate everything into the control's internal storage.
The trade-off is that sorting and selection tracking require a bit more work on our side, since the control doesn't own the data. The video tutorial covers both of these, including how to maintain the user's selection after re-sorting (which can get tricky).
You can find the complete source code on GitHub. The video description has commit hashes for each stage of the tutorial, so you can check out the code at any point.